Houzz Logo Print
s1c2

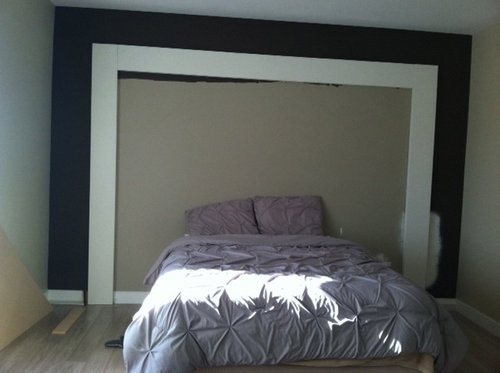
This is a copy of a 4,900 bed, I made it for $300

s1c2
hace 9 años
I got a local carpenter to to cut and hang the frame and side. made form lightweight MDF I painted the covered insulation with fabric and then used velcro to adhere to the wall. So far so good:-)

Comentarios (91)

  • fab8
    hace 9 años
    Love love love that headboard!
  • lcl1984
    hace 9 años
    beautiful…all of it.
  • PRO
    Interior Affairs -- Vickie Daeley
    hace 9 años
    Great Job! Congratulations!
  • zazfuzzroc
    hace 9 años
    At first when you said insulation.....I was like...What? lol :) Then realized it was boards. :) I think it's absolutely genius!!! Glad you're happy and proud....you should be ....you did great! Enjoy it! :)
  • Vanessa
    hace 9 años
    Wow, you are one smart lady. This is most impressive. I want those lamps!
  • budmickl
    hace 9 años
    Love the comforter! Where did you find it? And headboard is really nice too.
  • PRO
    Spring Greenworks LLC
    hace 9 años
    How did you achieve the stitching and tufting?
  • Nelson Rajkamal
    hace 9 años
    Awesome man..
  • Kristen Long
    hace 9 años
    Where did you find the step-by-step instructions to achieve this look? If there isn't any, can you post them? This is so awesome!!!
  • 77cherry77
    hace 9 años
    Beautiful & Job Well Done!
  • Darzy
    hace 9 años
    Fantastic!
  • Kristen Long
    hace 9 años
    What are your wall measurements?
  • User
    hace 9 años
    Última modificación: hace 9 años
    Excellent job. You would never know it was not the $5000 bed. Good job with the button tufting. Very professional.
  • PRO
    Stamps Design Services
    hace 9 años
    I have seen other variations of this type of headboard, previously; your version is quite impressive! Great job!
  • mifoi
    hace 9 años
    Solution simple et jolie
  • PRO
    Sonia Daigle / Vivre Ici Décor
    hace 9 años
    Bravo!!! very inspiring and it looks so professionally designed, I love it ;))
  • Lynne Brewer
    hace 9 años
    How did you do the floating nightstands. Is the brown part of the headboard or is it painted wall with the white frame being wood
  • condomary
    hace 9 años
    I'm booking marking this and going to Home Depot. WOW and BEAUTIFUL
  • PRO
    Keri Fields Interiors, LLC
    hace 9 años
    Looks Great! Very impressive!
  • PRO
    Spring Greenworks LLC
    hace 9 años
    Not to be difficult but you actually painted the button details and depth of the quilting w paint?
  • kailuaaloha
    hace 9 años
    Sorry but it's out of scale and proportion.....perhaps you can get a king size bed....this one is vpbeing swallowed up....What you could also do is paint the wall that shows, the same color as the frame and it would look more cohesive....
  • PRO
    Refined Design
    hace 9 años
    I think the proportions look exactly as your inspiration picture. At this point it doesn't look like you could even fit a larger bed in between the nightstands as some have suggested. I think the only thing I would do is purchase two larger sized lamps to put on either side of the bed like the inspiration pictures have.
  • chinch
    hace 9 años
    it's not a headboard, it's a wall and quite a showstopper at that! congratulations on a beautiful job and all that extra money you have in your wallet. which you do not need to spend on a king sized bed.
  • onegr8lady
    hace 9 años
    @S1C2: I absolutely *LOVE* what you did- kudos to you for challenging yourself to replicate the look. You did a fabulous job! One question: Did you put some sort of filler piece where the padded squares met? i.e. At the centre of the "X"
  • PRO
    Dawson & Clinton
    hace 9 años
    Great work, what a fun, mostly diy project. The bed looks spectacular
  • Sunny K
    hace 9 años
    congratulations!
  • tradhome
    hace 9 años
    Like it:)
  • Karen @into my window
    hace 9 años
    This looks fantastic and very custom. Well done making your very own unique piece!
  • PRO
    Spring Greenworks LLC
    hace 9 años
    Still would like to know if you painted the diamond pattern and button tufting, and how you created the relief look???
  • PRO
    Spring Greenworks LLC
    hace 9 años
    We all would like to know.
  • zazfuzzroc
    hace 9 años
    Última modificación: hace 9 años
    I believe.... don't quote me.... that they are insulation boards wrapped with batting and then material applied over it. Can't help on the button aspect. Some use hot glue? :)
  • beverlynn
    hace 9 años
    Good for you and good job!!! I can appreciate the savings!!! Last year, I bought a regularly priced $3,000 walnut bed for $425 at an Interior Design store's going out of business sale! Us regular folks appreciate beauty and quality also!
  • Crystal Walker
    hace 9 años
    Great job
  • PRO
    Krystina Hollenbeck for HiLuXeLifestyle
    hace 9 años
    very creative!! great job!
  • Natalie
    hace 9 años
    Última modificación: hace 9 años
    Hi---I'm certain the buttons were individually covered with the fabric, and threaded through the backside---when the thread is pulled taut the batting/fabric is pulled inward (stressed), thus creating a dimensional look. At least that's how I've seen it done. There are several tutorials on how to do tufting, etc. Here's a couple for those who are interested. :)

    http://www.hometalk.com/3019163/how-to-build-a-tufted-plank-headboard?se=fol&tk=5v6ef7&position_type=posts_follow&position_num=6


    http://www.livingwithpunks.com/2011/11/made-diamond-tufted-headboard/
  • zazfuzzroc
    hace 9 años
    Natalie, I'm not sure because she attached the squares to the wall with Velcro. Maybe she'll return with a full how-to? Lol :)
  • Natalie
    hace 9 años
    Última modificación: hace 9 años
    Perhaps just sewn on from the front. Not too difficult to achieve the tufted look sewn on, but then again, I sew/seamtress. :) You are too---yes, ZaZ?
  • zazfuzzroc
    hace 9 años
    Yeah Natalie, mostly holes....in whoever's clothes! LOL ;)
  • Natalie
    hace 9 años
    LOL! I think whatever her method/technique she did here, is just FABULOUS! It's a show-stopper for sure. :)
  • PRO
    Zaniboni Lighting
    hace 9 años
    Wow! Stunning. Wish you had don't a DIY walkthrough of your process!
  • PRO
    Spring Greenworks LLC
    hace 9 años
    Thanks Natalie, we will get to the bottom of this:)
  • PRO
    Gilmans Kitchens and Baths
    hace 9 años
    Smart and Stunning! - Janis, GKB
  • wisneb
    hace 9 años
    Love diy and it looks great!
  • PRO
    Gilmans Kitchens and Baths
    hace 9 años
    Great improvement!
    -Angeline, GKB
  • PRO
    Betty Wasserman Art & Interiors
    hace 8 años

    Well done!

  • Sunny K
    hace 8 años
    Última modificación: hace 8 años

    Off topic - OP, do you mind sharing what type of flooring is seen in the pictures? Thanks!

  • PRO
    Studio NOO Design
    hace 8 años

    You did a really great job, it looks very pro. You are very handy , congrats !

  • sweetpead3
    hace 8 años
    LOVE IT!
  • Melanie Combes
    hace 8 años

    that is stunning, thank you for sharing ! it opens the perspective on headboards !

  • ash
    hace 8 años
    Fantastic! I really like it..i think there's no greater feeling than being able to say.. "I did that!!" lol...
España
Personalizar mi experiencia con el uso de cookies

Houzz utiliza cookies y tecnologías similares para personalizar mi experiencia, ofrecerme contenido relevante y mejorar los productos y servicios de Houzz. Al hacer clic en 'Aceptar' confirmo que estoy de acuerdo con lo antes expuesto, como se describe con más detalle en la Política de cookies de Houzz. Puedo rechazar las cookies no esenciales haciendo clic en 'Gestionar preferencias'.